Showing posts with label React. Show all posts

Monday, September 13, 2021

ClojureScript. Amplified.

"… we're going to build a web app with storage, authentication and everything …"

But how?

My favorite building blocks 🤩

I have tried out some tools that I find very useful. As you may have guessed, the code is developed with ClojureScript. A language I appreciate more each day. Developing an app, without the Interactive REPL? That would be taking a huge step backwards.

I have found that Material-UI works really well in the development of the app I'm working on. The components library cover many usage scenarios, it is well documented and there's a lot of code examples to learn from.

Recently, I added Storybook and really like the idea of developing user interfaces according to Component Driven Design. It reminds me of how I experiment with code using Test Driven Development. Just like TDD, I think tools like Storybook and Devcards changes the way we develop, to the better. Start small & build quality in.

Let's begin with a building block from my favorites list: AWS Amplify.

A basic setup for AWS Amplify & ClojureScript

The official AWS Amplify documentation is all about JavaScript. In this post, and in this example code repo, you will find a ClojureScript setup that I think will get you up & running quickly. First, set up AWS Amplify by following the first parts of the Official getting started guide. You will be creating an AWS account and installing a CLI to initialize your setup.

If want more details, have a look at Hey Webpack, Hey ClojureScript. It's a post describing a ClojureScript & Amplify specific setup that is used in the example repo.

Start coding, but where? 🤔

A pitfall might be where to place the auto generated client code from Amplify. I usually put files like the aws-exports.js at the same level as the root namespace.

In the example code repo, the ClojureScript source code lives in the src/main folder. That's also where I've added the aws-exports.js file.

Configure Amplify in the init function of your app.

Login & Logout with ClojureScript & the Amplify CLI

Adding authentication can easily be done by using the Amplify CLI.

From the docs:

"... The Amplify CLI supports configuring many different Authentication and Authorization workflows, including simple and advanced configurations of the login options, triggering Lambda functions during different lifecycle events, and administrative actions which you can optionally expose to your applications ..."

Use the Auth features in Amplify UI

There's a very useful Higher-Order React Component (aka HOC) in the AWS Amplify UI Library, that will render login and signup views.

I've chosen this less-lines-of-code approach by using the withAuthenticator HOC. To customize things like signup fields or styling, there is also a fully customizable Authorization component available in the Amplify UI library. Or you can use your own components.

The views entry point.
The passed in component is wrapped in the withAuthenticator HOC.

If you already have browsed the code in my example repo, you may have noticed the Reagent reactify-component and as-element functions. These functions are needed when passing components between ClojureScript and JavaScript.

Read more about React Components, elements and instances and how the interop is done with Reagent.

Create, read, update and delete

So far, we have used built in features that will render UI views and handle all auth communication with a backend service. To store, read and update data, we can use the Amplify API feature. Use the CLI to create a backend:

I have chosen GraphQL in my example code, but there's also a REST API option. When using GraphQL, all you need to do is to define data models. Amplify will create the backend infrastructure according to your models. In a matter of minutes, there are AWS AppSync endpoints & DynamoDB tables created for your app.

GraphQL

Here's a GraphQL model. An authenticated user should be able to add data to the profile, like a summary or an "About me" text. The user will be able to create, delete and update the data in the profile. Other authenticated users can read the data when they visit the user's profile.

The schema files belongs to the backend, and lives in the amplify folder of your repo.

async ClojureScript

The Amplify Client Library handles the communication with the backend services. All calls are asynchronous. In ClojureScript, you can use core.async. I haven't yet dig into the core.async stuff, so I'm using Promises here. I think it's a quite straight forward approach.

The data going through the wire is JSON. To make the developer experience better, I think it might be a good idea to add conversion functions to-and-from Clojure data structures. Like this one, converting user settings JSON to Clojure data:

Read more about the ^js type hints in ClojureScript.

Finally: Ship it! 🚢

Here's an excerpt from an amplify.yml that defines the build steps. If you add a definition file in your repo, AWS Amplify will use it in the CI/CD process.

This is the amplify.yml that I use in my example code repo.

There's more details at the official AWS docs about build settings and about amazon-linux-install.

Add UI building blocks to the amplified app

Now we have our amplified ClojureScript app. Let's add UI building blocks from Material-UI, a library that is very popular in the JavaScript & React ecosystem. Here, I'm using it via a ClojureScript library called reagent-material-ui. The library makes it possible to write components using Clojure data structures. You can read more about Material-UI and ClojureScript in my previous post Material Design in a Functional World.

Totally unnecessary css styling used here, but why not?

Testing the UI building blocks with ✨ Storybook ✨

I find Storybook very useful when experimenting with components and user interfaces in isolation. Being able to focus on one specific thing. There's many different aspects of developing an app, and it is sometimes difficult to handle all of them at the same time.

Storybook is a place for trying out things like css, styling, different viewports and UI events. You won't try out the AWS Amplify code here. The Interactive REPL is a better tool for that.

You'll find more about Storybook in Component Driven ClojureScript with Storybook.

Finally, check out my GitHub repo for ideas on how to create apps with the building blocks AWS Amplify, Material-UI, Storybook and ClojureScript.

That's a combination I'd like to call ✨ClojureScript. Amplified. ✨


Top photo by Drew Patrick Miller on Unsplash

Thursday, September 2, 2021

Material Design in a Functional World

"... Material is a design system created by Google to help teams build high-quality digital experiences for Android, iOS, Flutter, and the web ..."
from material.io

ClojureScript & React is A 💕 Story

With Clojure, you can write functional & minimalistic code. With ClojureScript and Reagent, you can write functional & minimalistic React components. By adding re-frame to it, we also have a powerful way of handling state changes and triggering events.

The code you write in ClojureScript is instantly compiled to JavaScript React components that runs in your browser. The entire JavaScript ecosystem is available with this kind of setup.

"... React components for faster and easier web development. ..."
from material-ui.com

Material-UI

Material-UI is a very popular React framework. And we can use it with ClojureScript. But the JavaScript interop can sometimes be bit of a hassle. Fortunately, there is a great ClojureScript library called reagent-material-ui that simplifies this a lot.

One thing to notice is that the Material-UI components use React Hooks heavily to inject styling and theming into components. This is something to think about when using Reagent. Basically, just use the functional component syntax [:f> my-component] and you’re all good.

Have a look at the reagent-material-ui docs about common pitfalls in the React/Reagent interop and a fully working example in this GitHub repo.

Storybook: a playground for components

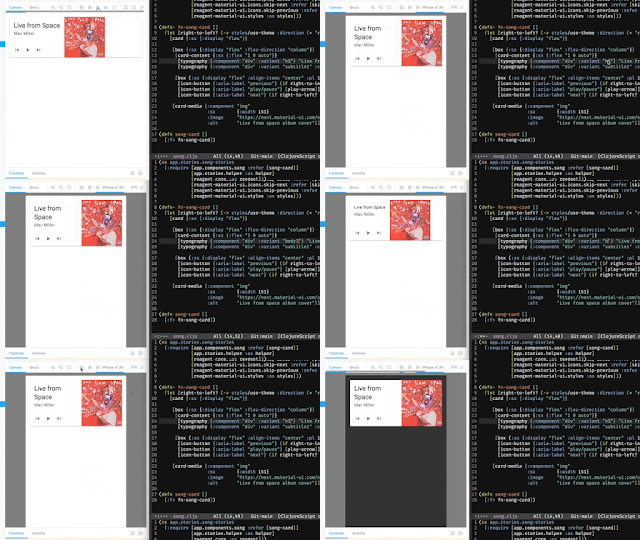
Here’s me playing around with the Card component, using ClojureScript and Storybook. I describe the Storybook integration in detail in this post.

The source code is available at GitHub.

No copy-paste?

I guess it can be a bit overwhelming for a Clojure developer to look at example code from the Material-UI site, with JavaScript/JSX syntax that is quite verbose (you’ll be even more overwhelmed by the TypeScript examples).

A JavaScript developer would probably copy-paste the example code and make some adjustments. We can’t do that. But it is worth the effort writing the code from scratch when discovering that the result is way more simplistic than the original. The amount of code written is usually half the size of the original JavaScript code. Yeah, that’s Clojure!

ClojureScript to the left, JavaScript to the right. Less is more.

Check out my GitHub repo with examples on how you can implement Material-UI components in ClojureScript, with hooks and styles - while having fun writing functional code.


Top photo by Thierry Lemaitre on Unsplash

Sunday, August 29, 2021

Hey Webpack, Hey ClojureScript

✅ ClojureScript is great.

✅ AWS Amplify is great.

🤔 Why are there errors in my browser console?

ClojureScript. Amplified.

Some time ago, I decided to give AWS Amplify a try for a new project. With Amplify, you can quickly create and deploy web apps and AWS backend services by using your command line.

Even though the Amplify code examples and docs are all about JavaScript, I wasn't too keen on abandoning my favorite REPL powered language: Clojure. 🤩

So, I decided to combine two great things: AWS Amplify & ClojureScript!

Amplifed, yes. But with 🔔.

I have learned a lot from this blog post by Robert J Berger about how to setup AWS Amplify with ClojureScript. New versions of the AWS Amplify libraries are released regurarly. The current Major version include breaking changes that probably will cause ClojureScript web apps to raise errors and stop working.

Until recently, I have had to rollback updates and use earlier versions of the Amplify libraries. Nothing wrong with that. But my inner Alarm Bells have been ringing constantly since noticing the word legacy in the official Amplify docs for those library versions (the aws-amplify-react library and the Amplify Auth feature in particular).

The newer Amplify libraries rely on Webpack specific features under the hood. The example setup described in the official Amplify docs include using react-scripts, that (if I'm not mistaking) will package code with Webpack. That kind of setup is not supported by shadow-cljs, a tool that is very common in ClojureScript projects.

Breaking things

In addition to being stuck using legacy code, the app will break each time I add a third party library from npm. I have learned that it is caused by not having a fixed version for amplify libraries defined in my package.json file. A quick fix is to set all AWS Amplify libraries to a fixed version and use that one forever. A version that is becoming more legacy for each day. 🔔🔔🔔

Fix the broken things

The main issue with AWS Amplify libraries, ClojureScript and shadow-cljs is described in this GitHub thread. There is also a suggested solution hinted by Thomas Heller, the creator of shadow-cljs.

A solution: shadow-cljs & Webpack working together

I have created an example app using AWS Amplify and ClojureScript in this repo. Here, shadow-cljs will only create a target JavaScript file containing requires to all of the third party JavaScript dependencies.

Webpack will use that target to create a JavaScript bundle. In a continuous deploy environment, this can easily be automated by executing two scripts instead of one (the shadow-cljs build and webpack).

This solution makes it possible to use the very latest versions of the AWS Amplify libraries, without any css quirks or being forced to use legacy code. Hey Webpack, Hey ClojureScript!

Nowadays, my inner alarm bells are nice & quiet.

Photo by Kamil Pietrzak on Unsplash

Saturday, February 27, 2021

Interactive Web Development

The workflow for developing web apps has been very much the same for quite some time, even if the tools have evolved and the programming languages have changed.

Write some code, save the file, switch to the browser window, hit the refresh button and wait.

Sometimes there has even been a couple of extra steps in between: write, save, compile, restart, switch to the browser, refresh, wait and repeat. The problem with this is that - at least for me - the focus on the actual problem to solve is paused or even worse: lost.

"Write code,
Switch to the browser window,
Hit the refresh button,
Wait ...
Now, where was I?"

But there’s hope!

🔥 Hot Reloading

With a modern development environment, you can use automation to get rid of some of the noice. Your code editor can probably be configured to detect when a file has changed and automatically save it.

With tools like Webpack for JavaScript and Shadow-cljs for ClojureScript, you can reload a running development web server - even replace code while the web server is running without loosing the current state. This is often called Hot Reloading and makes the development workflow a lot smoother than before. Very cool.

🧱 Building blocks

I really like the way React has solved problems with web development in general. React simplifies how you can separate features into components. At the same time, it promotes grouping relevant markup and code, by combining JavaScript & HTML into the JSX syntax. I think helps with keeping focus on the actual problem solving, with less navigating and flipping between files in the code editor. Good stuff.

♻️ The Virtual DOM

The Virtual DOM will give instant feedback when data has changed. The DOM is changed on the fly, without the need for page reloads or server side rendering. This is done by calculating the current state of the browser DOM and an in-memory copy of it. When there is a change in the copy, the relevant parts of the browser DOM will change. Really nice.

🦄 The Developer Superpower

Recently, I’ve learned about a really cool workflow called REPL Driven Development. I have used a REPL before, but have always thought of it as something that is used in a shell for some quick testing, not in the actual code editor. But with Clojure, this is the way we work. While you are in the editor, thinking, writing and looking at the code, you can evaluate it and get instant feedback. You can trigger events, browse state and even query the browser DOM! This is possible thanks to the Interactive REPL.

It’s almost like Magic. 🤩

I think this is unique to Clojure and ClojureScript. I’m not sure why this superpower doesn’t seem to exist elsewhere, but it probably has something to do with the structure of the language itself: code and data share structure and syntax.


✨This is Interactive Web Development

By combining hot reloading, building blocks & the virtual DOM with the Interactive REPL - we have something that I would like to call Interactive Web Development.

Arrange your code editor side-to-side with a browser window, to get instant feedback from both the user interface and the functionality when evaluating and experimenting with the code during development.


Photo at the top by Nong Vang on Unsplash

Have a look at my Func Prog Sweden second 2021 talk at YouTube that is covering this topic too. Direct link: ClojureScript: React with a Hiccup

Monday, January 11, 2021

Simple (within parentheses)

  • - Hey, what's ClojureScript?
  • - It's a thing that compiles Clojure to JavaScript.
  • - I get it. What's Clojure?
  • - It's a Lisp.
  • - ???
  • - You know, a functional programming language that uses a lot of parentheses.
  • - I … get it? 🤯

Don't worry. In this post, I will share some of the basics that I have learned about Clojure and ClojureScript.

Clojure?

With Clojure, you can write simple, functional and minimalistic code. Some of the cool things with Clojure are:

  • data is immutable
  • the REPL is a powerful tool
  • few keystrokes to make things happen

Clojure runs on top of Java, suitable for all kinds of "backend" things. It also runs on top of JavaScript. Yes, JavaScript - making it possible to develop all kinds of apps, tools, products and websites. There's even an option to run in a .NET runtime, but I haven’t tried out that one yet.

What does it look like?

Even though the syntax may look unfamiliar, you can already see in this silly example the less amount of keystrokes needed using Clojure, compared to JavaScript.

Parenthesis?

Everything you write in Clojure is a list, wrapped in parentheses. That may sound weird. I agree, it is weird. But your eyes will get used to it. In short, the format of writing something in Clojure is:

(operator operands) or even (function arguments)

Here is an example:

... and how it would be written in JavaScript:

If all this is new to you, you might have this expression in your face right now: 😬

That is perfectly normal. I have looked like that a lot during 2020. When digging deeper, you may need to go through The 12 Stages of Learning Clojure.

ClojureScript?

With ClojureScript, you develop web apps and write simple React components. You write code in Clojure, compile it to native JavaScript and run it in your favorite browser. The compilation happens all the time and automagically as you type.

Just like with Java or .NET in the backend, ClojureScript has native access to JavaScript. You can use and interact with your favorite npm packages and React components just as you would with JavaScript.

Reagent and React

I'm going to fast-forward a bit by adding a ClojureScript library called Reagent. With Reagent, you write React components but with Hiccup instead of JSX. Wait, what?

View components are built up using Clojure data structures. The example above creates html elements with Clojure vectors and keywords. This style is called Hiccup. It will save you a lot of keystrokes and you'll have a lot less of scrolling in your code editor.

What about state?

I'll fast-forward again by adding a very nice library called re-frame.

From the re-frame docs:
“... It has reactivity, unidirectional data flow, pristinely pure functions, interceptors, coeffects, conveyor belts, algebraic effects, statechart-friendliness and claims an immaculate hammock conception. All while being both simple and easy. ...” 💥🤯💥

With re-frame, data is stored in one place called the "app db". Your components will fire events and subscribe to changes in the app db. The cool thing is that you write code in a sequential way, making it very readable and easy to understand. However, the syntax of the actual events and subscriptions might take a while to understand, at least if you are new to Clojure in general.

Here, we have a Reagent component that adds a button component, only when the app is disconnected. It is subscribing to changes of disconnected in the app db. React will re-render the components when the app state has changed.

Cool, but can I use my favorite editor?

Yes, most likely. I know there are Clojure plugins for VS Code, Atom, Sublime Text and intelliJ. I use Emacs, because ... I just like it.

There is something important and special going on with developers and their text editors. I think you will be able to find your favorite dev setup. I also think that you will learn a lot of new programming concepts and styles when reading more about this cool language and its libraries.

Photo by Marcos Paulo Prado on Unsplash

Wednesday, January 4, 2017

You might (not) need a JavaScript library

JavaScript today is like:
"Yeah great, and now you need Webpack, Babel, npm, yarn, React ...".

Redux? Relax.

Developing a front end web project of today can be a bit intimidating, especially when the home base is back end development. What about all those frameworks and tools, why use them?

I am currently learning about React, and I like it. React have JSX, ES2017 and a nice logo. That is cool, but my favorite thing with React is how code is organized. A user interface is built with components: small and isolated "packages" of html & JavaScript. That is a pattern I like.

Components with vanilla JavaScript?
When learning about React patterns, I started thinking about how this could be done without using React, ES2017, Webpack or any of the other libraries and frameworks out there. Is that even possible?

Okay, but why?
I want to learn and understand the problems that are solved using a library. Also, I want to find out what problems can be solved without an npm install. One way of doing that is to write all code with plain old vanilla JavaScript, html, css and find out what pain is removed by which library. Also, I think it would be a fun challenge!

Example code
You will find all code referenced in this blog post at my GitHub page

No build step required
So, I spent some late nights coding and learning. The code in the main branch of this repo does not require any build steps or npm package downloads. The "listItem component" is made of two parts: JavaScript in a code file and an html template in a separate file. The render function will create a DOM object containing html from the template, with data that is passed in to it, and return it in a callback.

code from listItem.js:
      function render(props, done) {

        // load the template using a helper
        templates.load('/src/listItem/listItem.html', function (el) {

          // 'el' is the html template element
          el.textContent = props.data;
          el.addEventListener('click', props.onClick);

          // pass the element to be added to the DOM
          if (done) {
            done(el);
          }
        });
      }

      return {
        render: render
      };
    
The listItem.html template:
      <li class="listItem" title="the listItem component"></li>
    
This is of course a very simplistic example with a single tag html template, but I think it already highlights issues: where's the data added? To understand where data is added, we have to read & understand the contents of the render function. I think it would be nice if the data to be rendered is visible in the actual template.

Time to grow a Mustache?
A template render engine can solve that. Here's the same component, using a template engine called Mustache.js. You will find the code in a separate branch of the GitHub repo.
      function render(props, done) {
        // pass data to a modified template loader
        templates.load('/src/listItem/listItem.html', props, function (el) {
          el.addEventListener('click', props.onClick);

          if (done) {
            done(el);
          }
        });
      }
    
compare with the vanilla code

The templates helper now use Mustache to render the html from the template and the data. It is now possible to write html templates with placeholders for data like this:
      <li class="listItem" title="the listItem component">{{data}}</li>
    
code from the templates.js file:
      container.innerHTML = Mustache.render(template, data);
    
More issues?
If you look at the source code in the main branch you'll notice the JavaScript files is written with a coding style called IIFE (immediately invoked function expression). It is used to isolate code and makes it possible to write modules without using any framework. Also, every single file is added with a script tag in the html body of the main page (index.html). Some modules depend on others and have to be added in the correct order. That's not great.
      <script src="src/templates.js"></script>

      <script src="src/listItem/listItem.js"></script>
      <script src="src/list/list.js"></script>
      <script src="src/terminal/terminal.js"></script>
      <script src="src/nav/nav.js"></script>
      <script src="src/logView/logView.js"></script>

      <script src="src/app.js"></script>
    
Solution: JavaScript AMD modules
In a separate branch, I have converted all of the immediately invoked function expressions (IIFE) to AMD modules. I use Require.js that takes care of module loading and dependencies. Instead of a very long list of html script tags, there is only an entry point defined.

from the index.html file
      <script data-main="src/app" src="lib/vendor/requirejs.js"></script>
    
Here is the listItem component as an AMD module:
      define(['templates'], function (templates) {
        function render(props, done) {
          templates.load('/src/listItem/listItem.html', props, function (el) {
            el.addEventListener('click', props.onClick);

            if (done) {
              done(el);
            }
          });
        }
        return {
          render: render
        };
      });
    
compare it with the previous branch

But wait. Don't we have native modules in Javascript now?
Oh, I forgot. It is 2017 and ECMAScript 2015 was released almost two years ago. A nice module system was included in it. Finally there is a common standard in the language! I have rewritten the code to ES2017 style - with arrow functions, the const keyword and most importantly, the ES import/export feature. Now, the listItem component looks like this:
      import load from 'templates';

      export function render(props, done) {
        load('/src/listItem/listItem.html', props, (el) => {
          el.addEventListener('click', props.onClick);

          if (done) {
            done(el);
          }
        });
      }
    
compare the ES2017 code with old school JavaScript

I think the code has improved a bit. ES2017 is great, but there are trade offs to be aware of. Many browsers don't have enough support for this version of JavaScript yet. To make it work in all kinds of browsers and devices we need to introduce a build step: the code need to be compiled from ES2017 to vanilla JavaScript with Babel.

The package.json file in the project has quite a few scripts compared to the original framework-and-build-step-free version. In addition to dependencies like Mustache.js and Require.js, there is a compile step and a Babel polyfill dependency added:
      "scripts": {
        "deps:lib": "mkdir -p -v lib/vendor",
        "deps:requirejs": "cp node_modules/requirejs/require.js ...
        "deps:mustache": "cp node_modules/mustache/mustache.min.js ...

        "deps:polyfill": "cp node_modules/babel-polyfill/dist/polyfill...
        "deps": "npm run deps:lib && npm run deps:requirejs && npm run ...
        "transpile": "babel src --out-dir lib --source-maps",

        "lint": "eslint src",
        "build": "npm run lint && npm run transpile && npm run deps",
        "start": "npm run build && live-server"
      }
    
More frameworks, more problems?
When browsing the page there is now a couple of third party libraries loaded to the client, besides our own modules. This might cause a not so great experience for users with a slow connection.

Bundling & minification
While we're at it, why not add another build step that will bundle all JavaScript files to one single file? This will reduce the number of requests from the browser. With minification we also will get rid of a couple of Kilobytes. The entry point is now one bundled and minified JavaScript file.
      <script data-main="lib/bundle/main"
              src="lib/vendor/requirejs.js"></script>
    
The source code in this branch is compiled from ES2017 to browser friendly AMD modules. With Require.js, there is a tool for bundling & minification included (called R.js) and used in this branch. compare the branches

Heard about Webpack?
The scripts section of the package.json file is quite massive now and probably difficult to understand. By using Webpack, most of those build steps are no longer necessary. Webpack does a lot of things, it's like a swiss army knife (that's both good and bad, I guess).

package.json with Webpack:
      "scripts": {
        "lint": "eslint src",
        "build": "npm run lint && webpack",
        "start": "webpack-dev-server"
      }
    
compare the two branches, with bundling vs with Webpack

Where did it all go, how is that even possible? Okay, I forgot to mention Webpack.config. Sorry. Some of the build magic live in that file now.

So, did Webpack make any difference?
One nice thing with Webpack is that there is no longer any need for Require.js. Webpack will resolve ES2017 modules and convert them to plain vanilla JavaScript before the bundling & minification. Also, Webpack has a local dev server feature (with auto reloading on file change) that I like.

Add React to the mix
This is how the listItem component looks like when converted to React. The template files are gone, everything is written in the JavaScript modules using the JSX syntax. There is no longer need for a custom template loader or mustaches. Compared to the source code in the previous branch, this one has less code. I like less code.
      import React from 'react';

      function ListItem(props) {
        return <li className='listItem' title='the listItem component'
        onClick={props.onClick}>{props.data}</li>;
      }

      export default ListItem;

    
React: Before vs After

Conclusion
By experimenting with one library at a time, I have learned about the value added and also some of the trade offs that comes with using a tool or a framework. Sometimes, plain vanilla JavaScript is just enough, and sometimes a framework or library will make life easier. You might (not) need a JavaScript library.